
A design destined for print requires setting up to certain specifications to ensure that the work is printed correctly by industrial lithographic or digital print firms. This often starts with the initial document upon which the design is to be created by adding the correct bleed area and crop marks. Let’s take a look at what crops and bleed actually are, why they are required and how to set them up in your favourite Adobe package.
Baffling Bleed
Let’s start with the term bleed, this is the area of artwork that is extended beyond the actual dimensions of the document. It is used to avoid strips of white paper showing on the edges of your print should the batch be misaligned when cut to size.
Any objects in your artwork that touch the edges of the document require bleed, for instance a background colour or image should spread to cover the entire bleed area as should any objects that creep in from the side of the page.
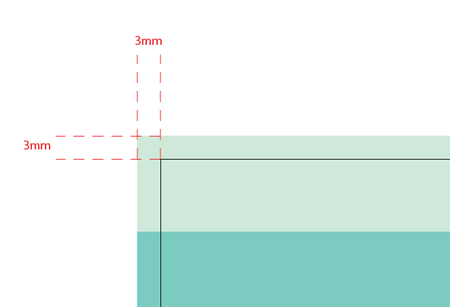
In the UK at least, bleed of 3mm is commonly required. This 3mm accounts for each of the four sides of the page, therefore you should add 6mm to the width and height of the document, for example:
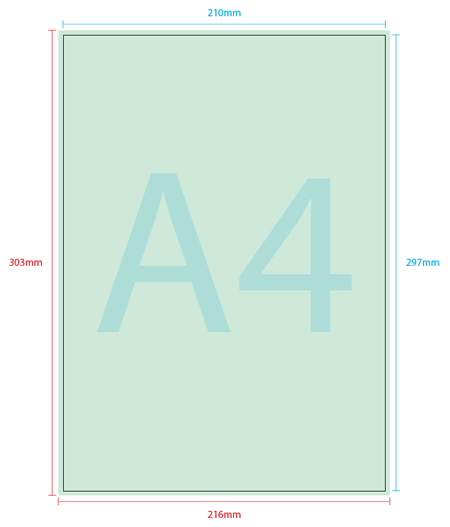
A4 Paper = 210mm x 297mm
210mm + 6mm = 216mm
297mm + 6mm = 303mm
Total Document Size = 216mm x 303mm

In addition to bleed, you should also add a margin to the edges of the document to avoid having your objects look as if they are about to fall of the page or even worse actually get cropped off when the document is trimmed! The amount of margin is personal preference, but 3mm, 5mm or 10mm is usually used depending on the size of the overall design.
Setting Bleed in Photoshop
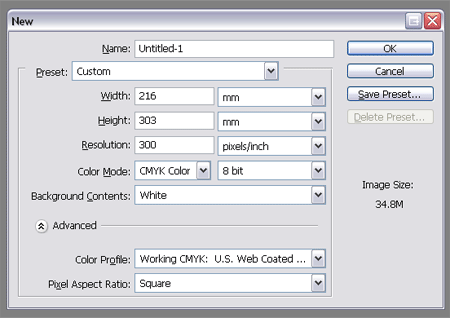
When creating your document, simply make the calculations to the artwork size as above and enter them into the Width and Height boxes.
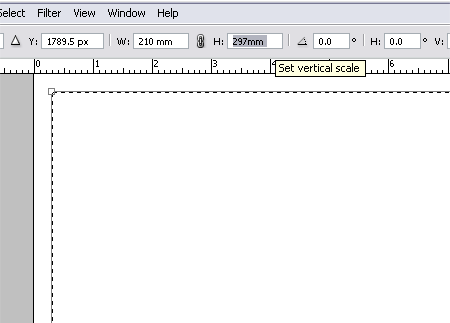
It is always useful to place in some guides to remind you where the trimmed document size lies, I usually do this by heading to Select > All, then Select > Transform Selection.
Right click on the W and H options and change the measurements to MM, then enter the normal document size.
Drag guides to the borders of the new selection.
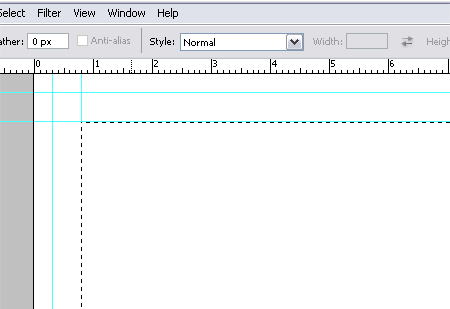
Let’s not forget to add our margin, in this case we’ll say 5mm per side. Use the same technique to create guides another 10mm smaller (5mm x 2).
Setting Bleed in Illustrator
In Photoshop we altered the overall size of the document to accommodate bleed, however in Illustrator try and keep the document correct to the desired finish size.

Remember any objects spanning to the edge of the artboard will require bleed, run these out an extra 3mm per side. Using a temporary rectangle or margins at the overall bleed size can help align the objects.
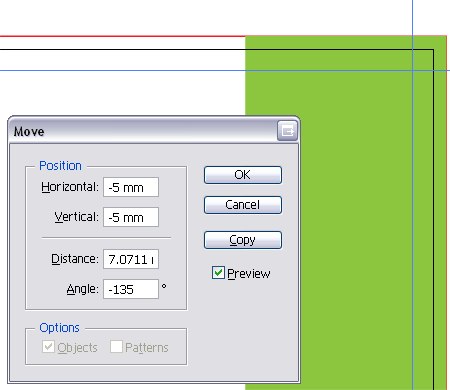
Drag margins and snap them to the artboard. Right click on the artboard and unlock the guides, select each guide in turn and press the Enter key to move it. Enter your desired margin figures into the X and Y boxes to move the guides into position.
Setting Bleed in InDesign

With InDesign being primarily a desktop publishing application it has the most options for setting up a document for print. Under the New Document menu you will notice individual options for Page Size, Margin and Bleed, simply enter in your figures and let InDesign setup the document for you!
Confusing Crops
Crop marks are the little lines that sit around the edge of the document showing where the area of bleed ends and the proper document area begins, they work alongside bleed to tell the print worker where the paper needs trimming.
Crop marks are usually hairline or 0.25pt in thickness and are set in Registration Black.
Setting Crops in Illustrator
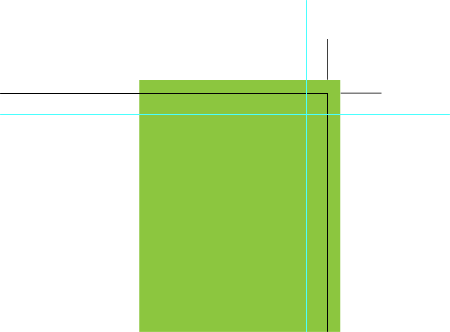
There are a couple of ways to set crop marks in Illustrator, the first is to go to Object Crop Area > Make. This will create a set of uneditable crop marks directly around the document edges.
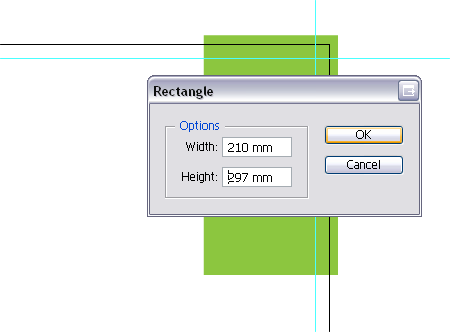
A second method is to create a rectangle the size of the document, then go to Filter > Create > Crop Marks.
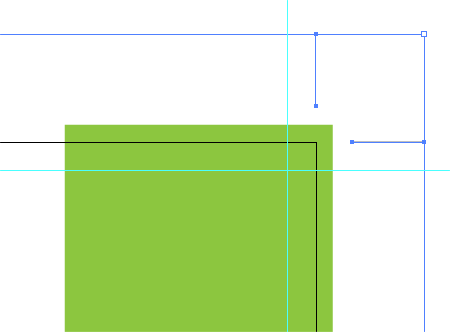
This will create a set of editable crop marks according to the area specified. A benefit of this method is that they crops can then be shortened if needed, Illustrator tends to produce huge crop marks that can sometimes be a little overkill for designs such as small business cards. Editing the points to shorten the crops down to say 3 or 5mm is sometimes a little more efficient.
Another advantage of this type of crop is that multiple areas can be created, particularly useful if you are laying out a sheet of multiple designs.
Setting Crops in InDesign
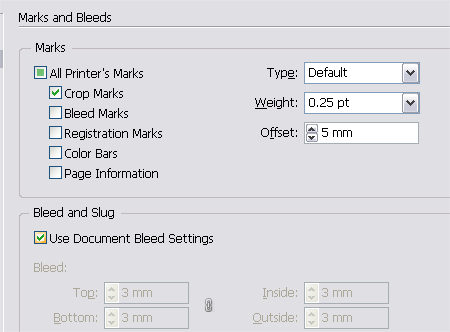
InDesign automatically adds crops when exporting the document to PDF, under the Marks and Bleed settings simply check the printers marks required in the dialog box.
What Happened to Photoshop?
While I’m sure crop marks could be manually drawn in Photoshop, it probably isn’t worth it considering the time it would take to simply import into Illustrator or InDesign and create the print file accordingly!
